Order
Direct-Link to the module: my-shop.de/b2border
Order Overview
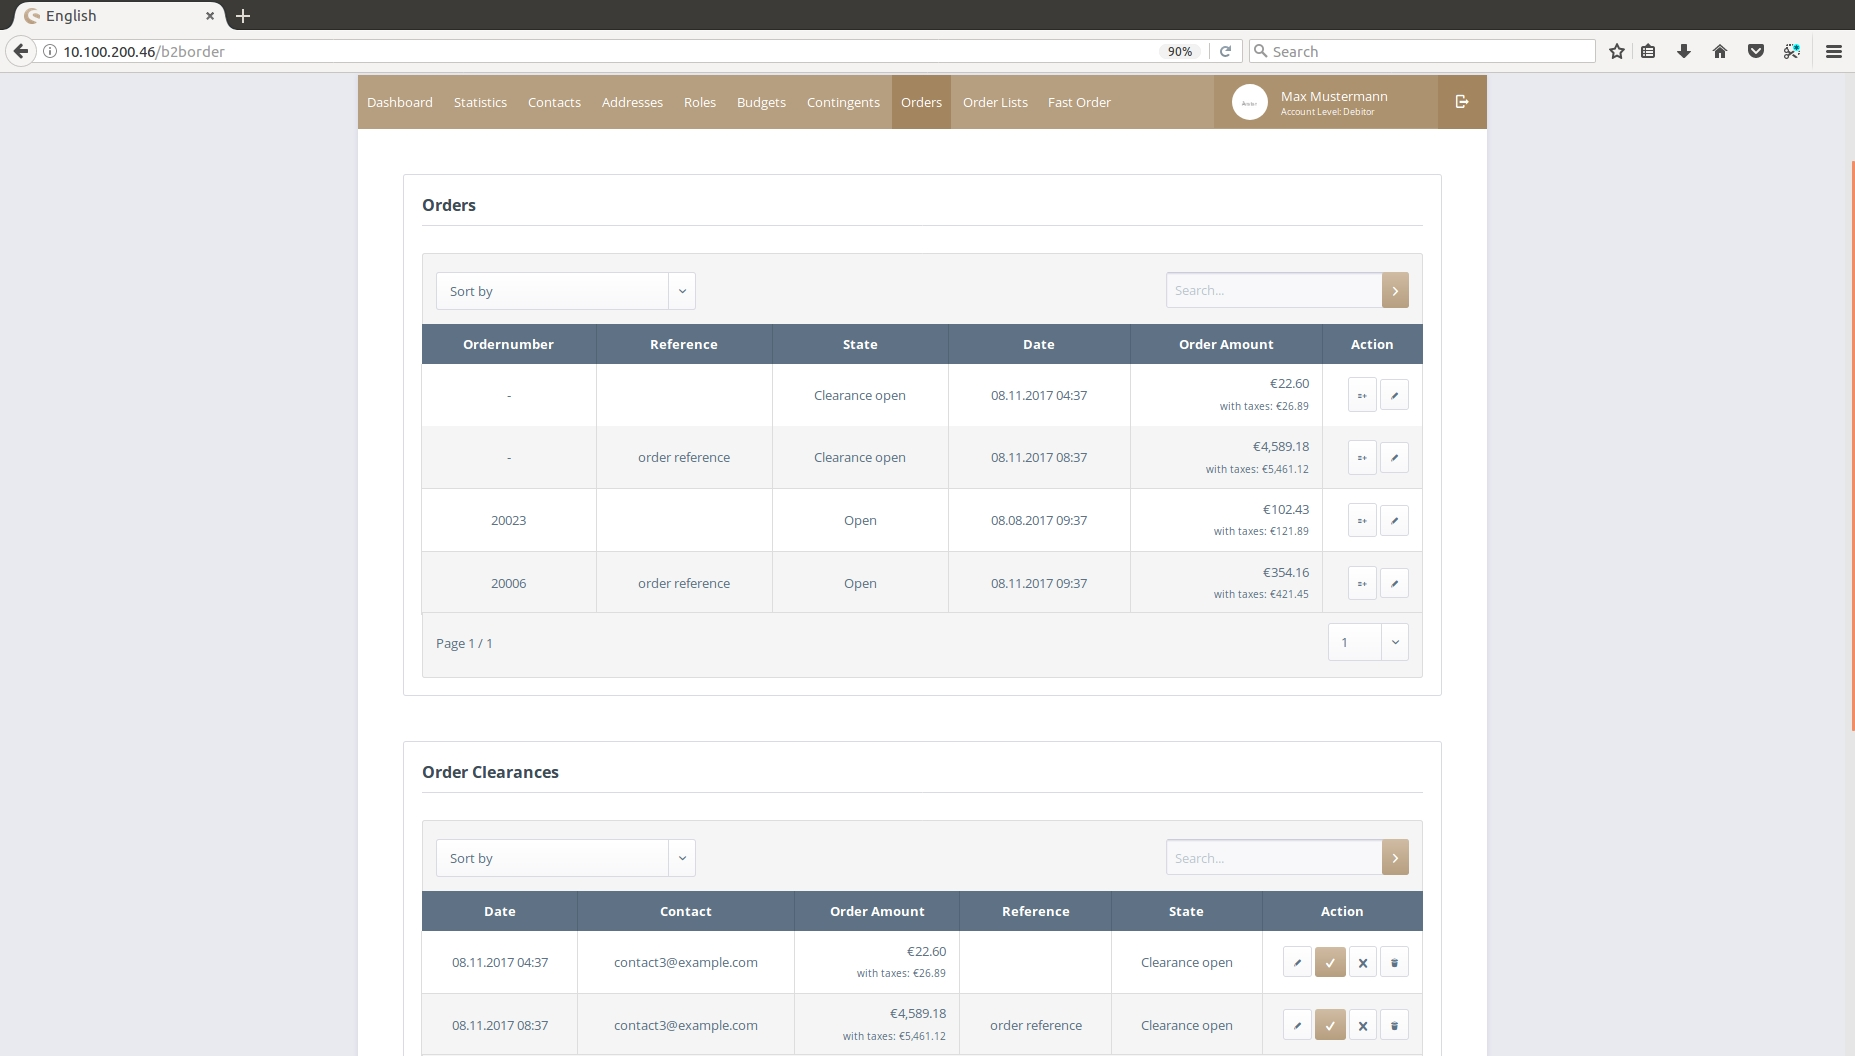
The Order overview shows two distinct grids. The first one is a list of all orders from your account and other accounts with fitting visibility rights. The second one is a list of all orders you are allowed to clear.
Order History
If you are logged in as a Contact you will see all your personal orders, if the account is a Debtor you will see all orders triggered by your whole organization. This overview mainly serves the purpose to show you th current state of past orders. You will see if the already got approved, declined, or even send. From here you can:
- Open the order details and see the whole history of the order.
- Create an order list for later uses.
Run into order clearance
First of all you have to place a temporary order which is out of your allowed contingent rules or budgets. In the confirm step instead of direct order placement you can only choose "request clearance".
Accept and Decline orders
Users with fitting contingent rules can now accept or decline the order which was placed before. To accept the requested order you can use the check button. During the accept process, the temporary order will be changed to a normal order. The shop administrator is now able to deliver the placed order.
If you want to decline the order there is a cross button which change the temporary order to a permanent declined order.
![]()
Decline
Triggering the decline button will open a modal box, where you can optionally add a comment. This comment will be available to the user who started the order in the first place.
![]()
Accept
Triggering the accept button, you will be redirected to the confirm page and have a cart filled with the items of the temporary order.
You can place the order, ask for an offer or cancel the clearance process with the cancel Clearance button.
![]()
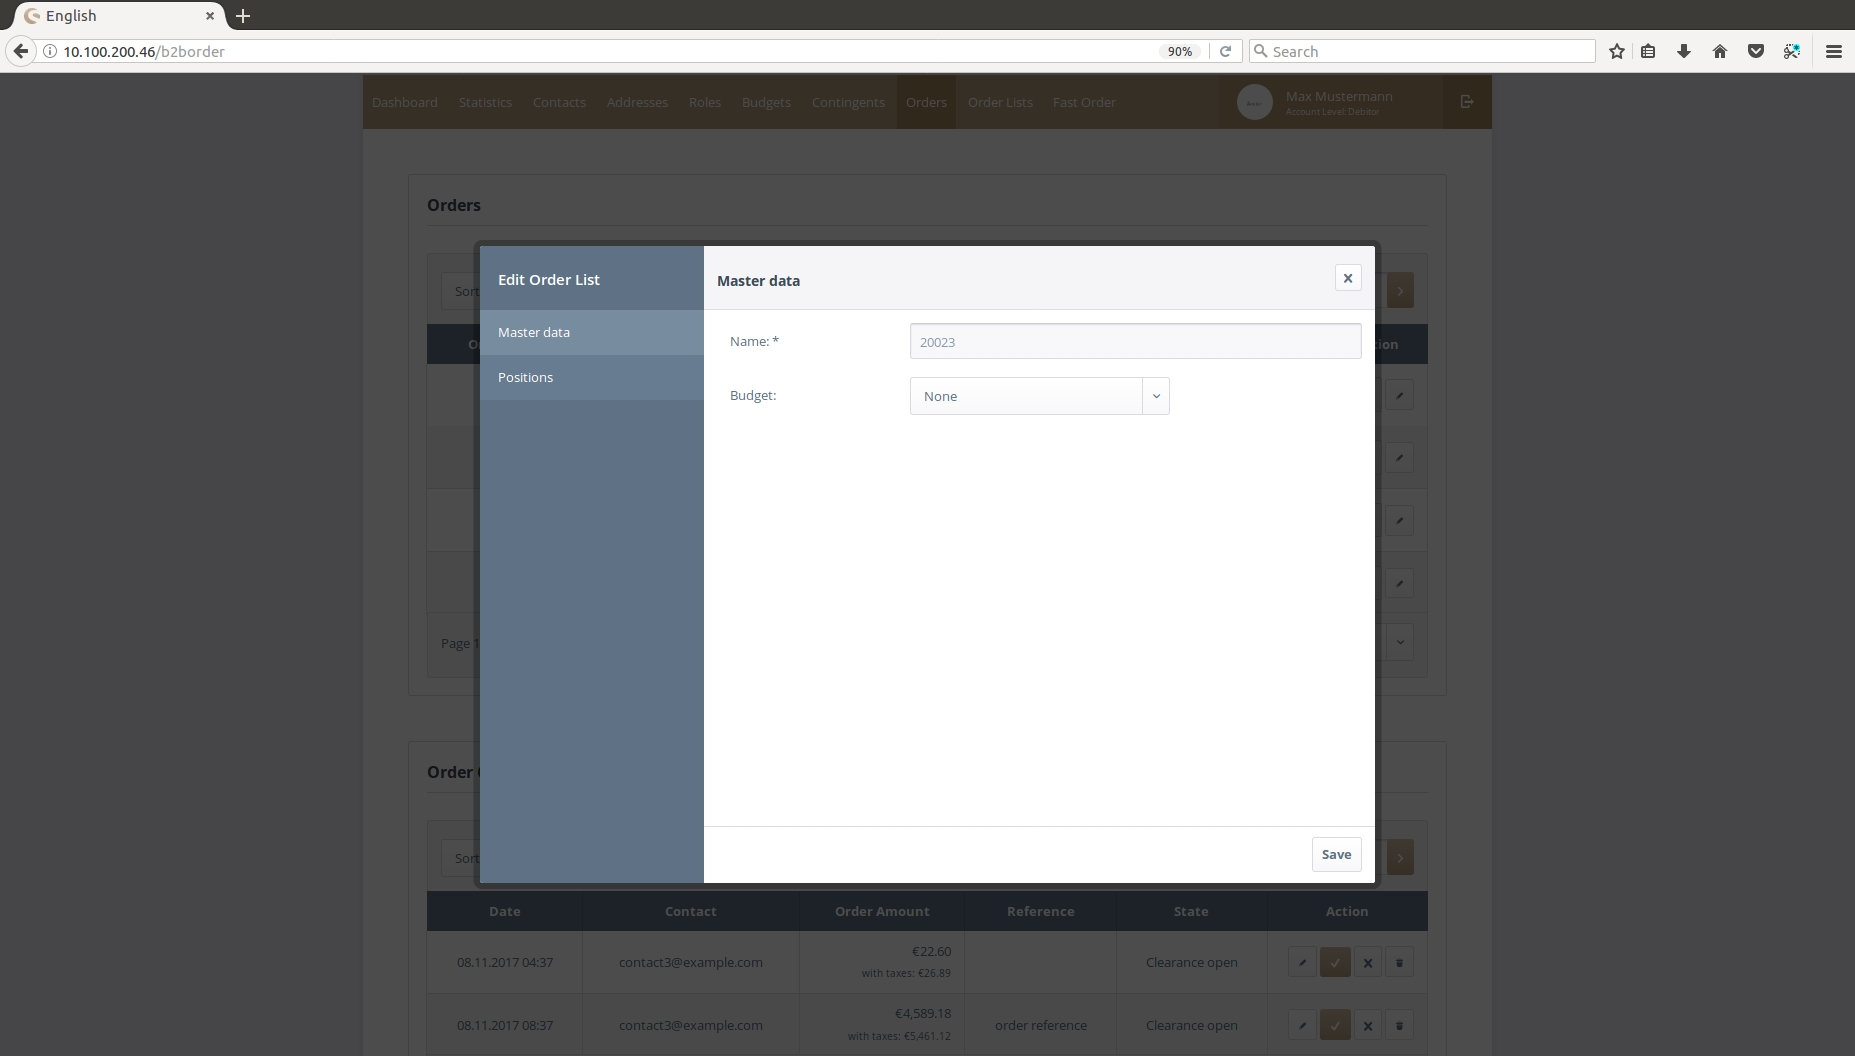
Create Order List
With the order list create permission an order list can be created through every order by clicking the create order list button. The detail window of the order list will open and the data of the order list can be changed.
Edit Order
A click on the row or the edit button opens an Order.
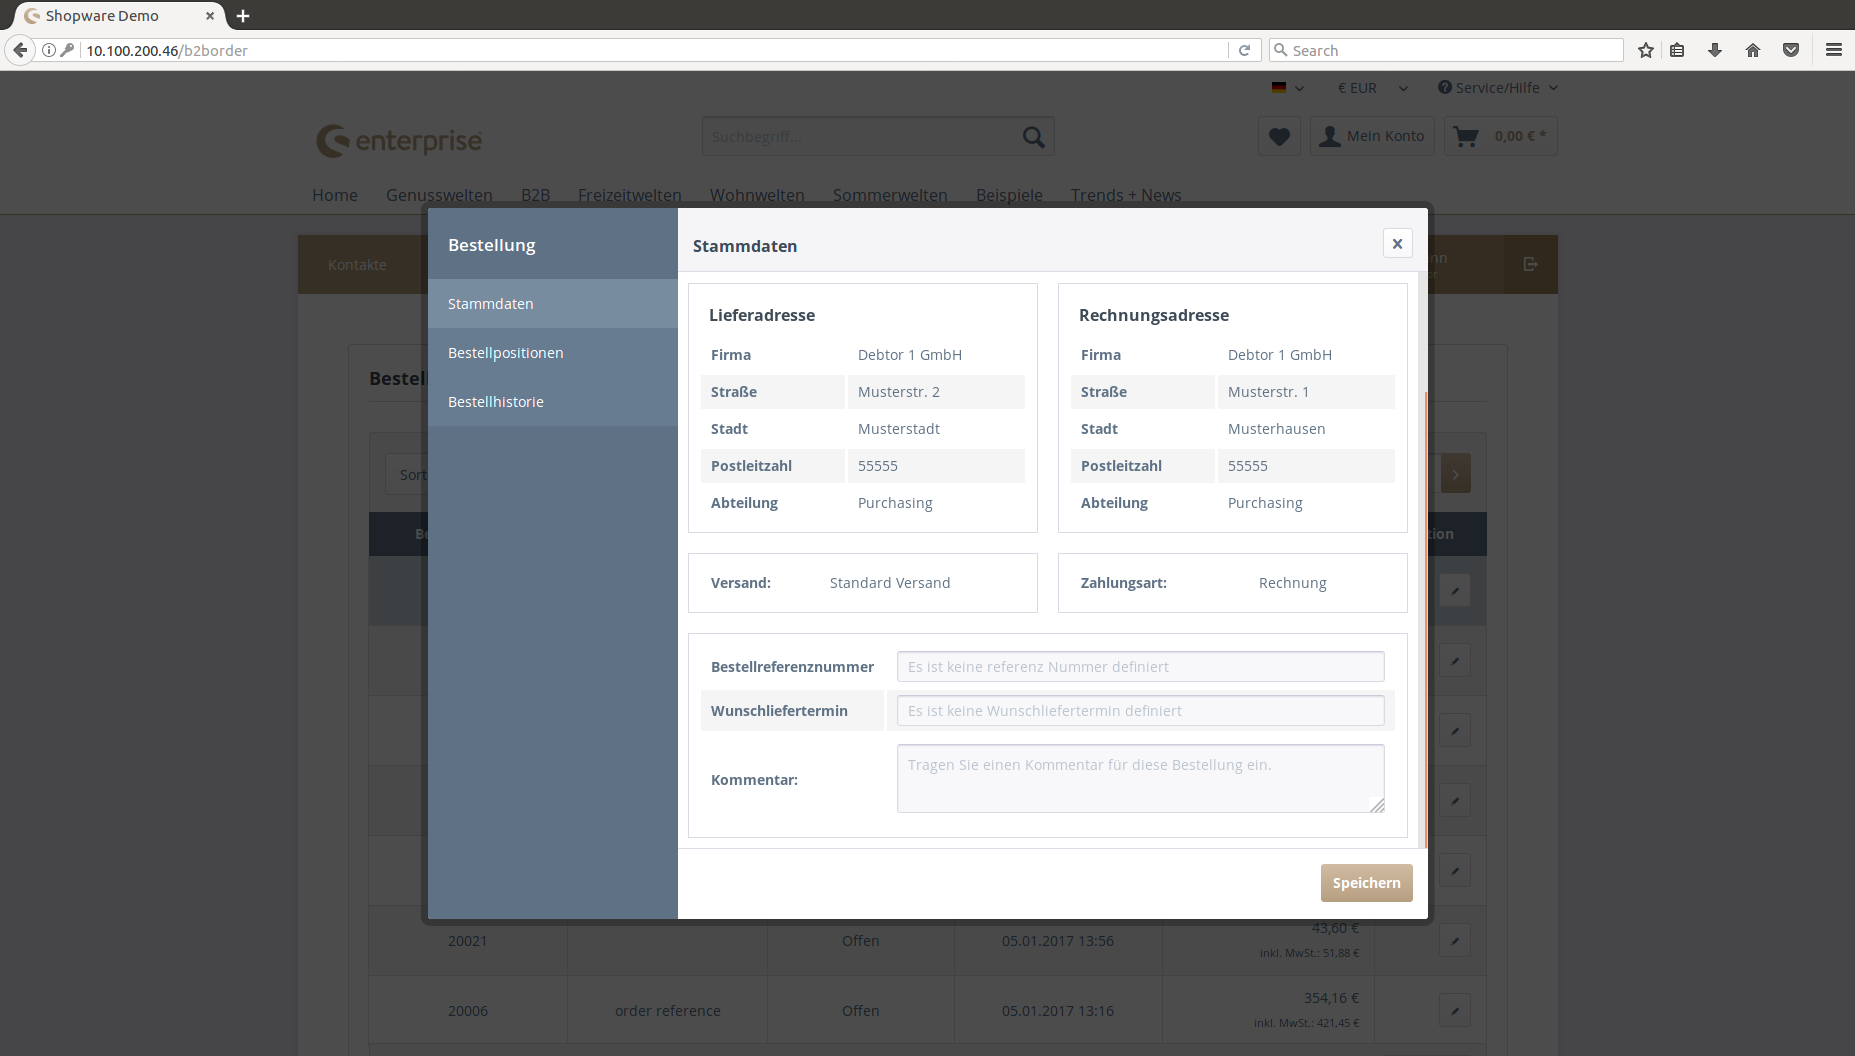
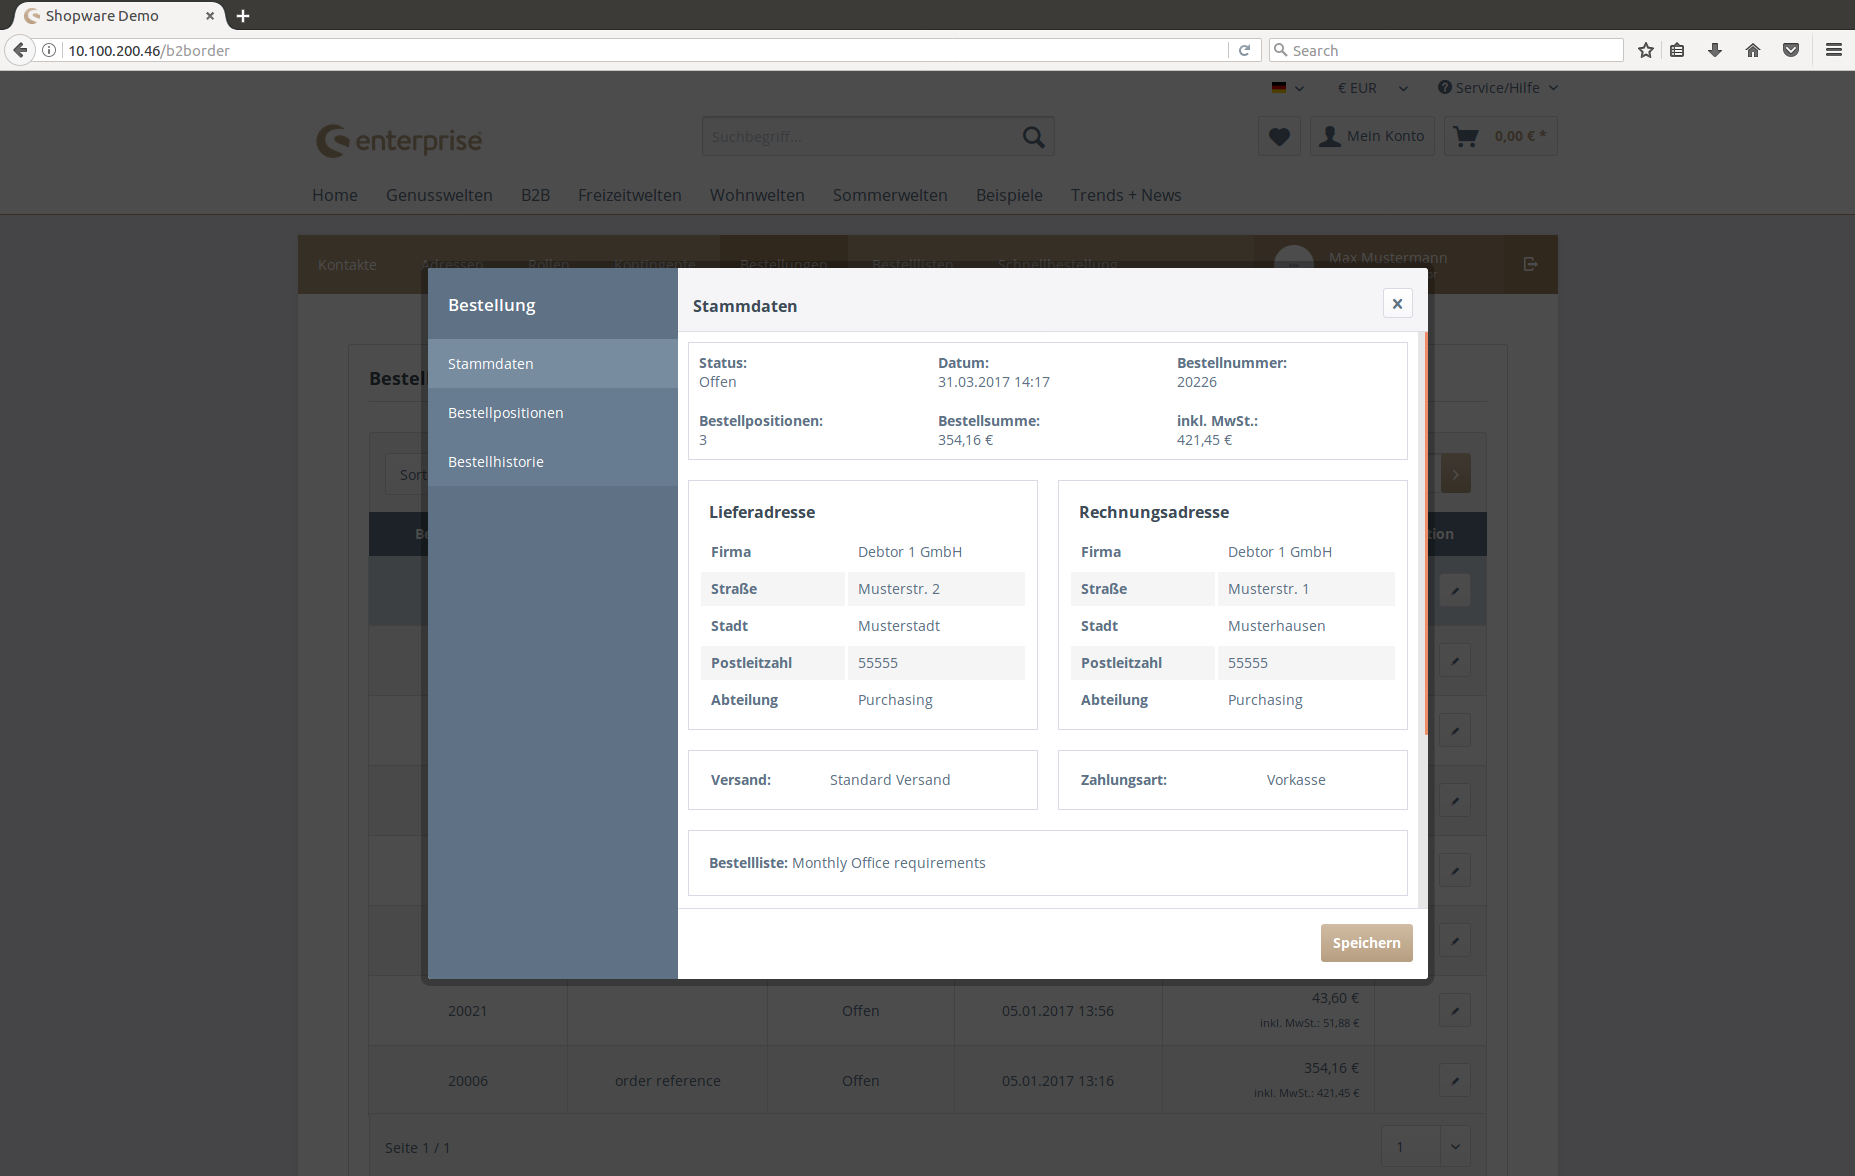
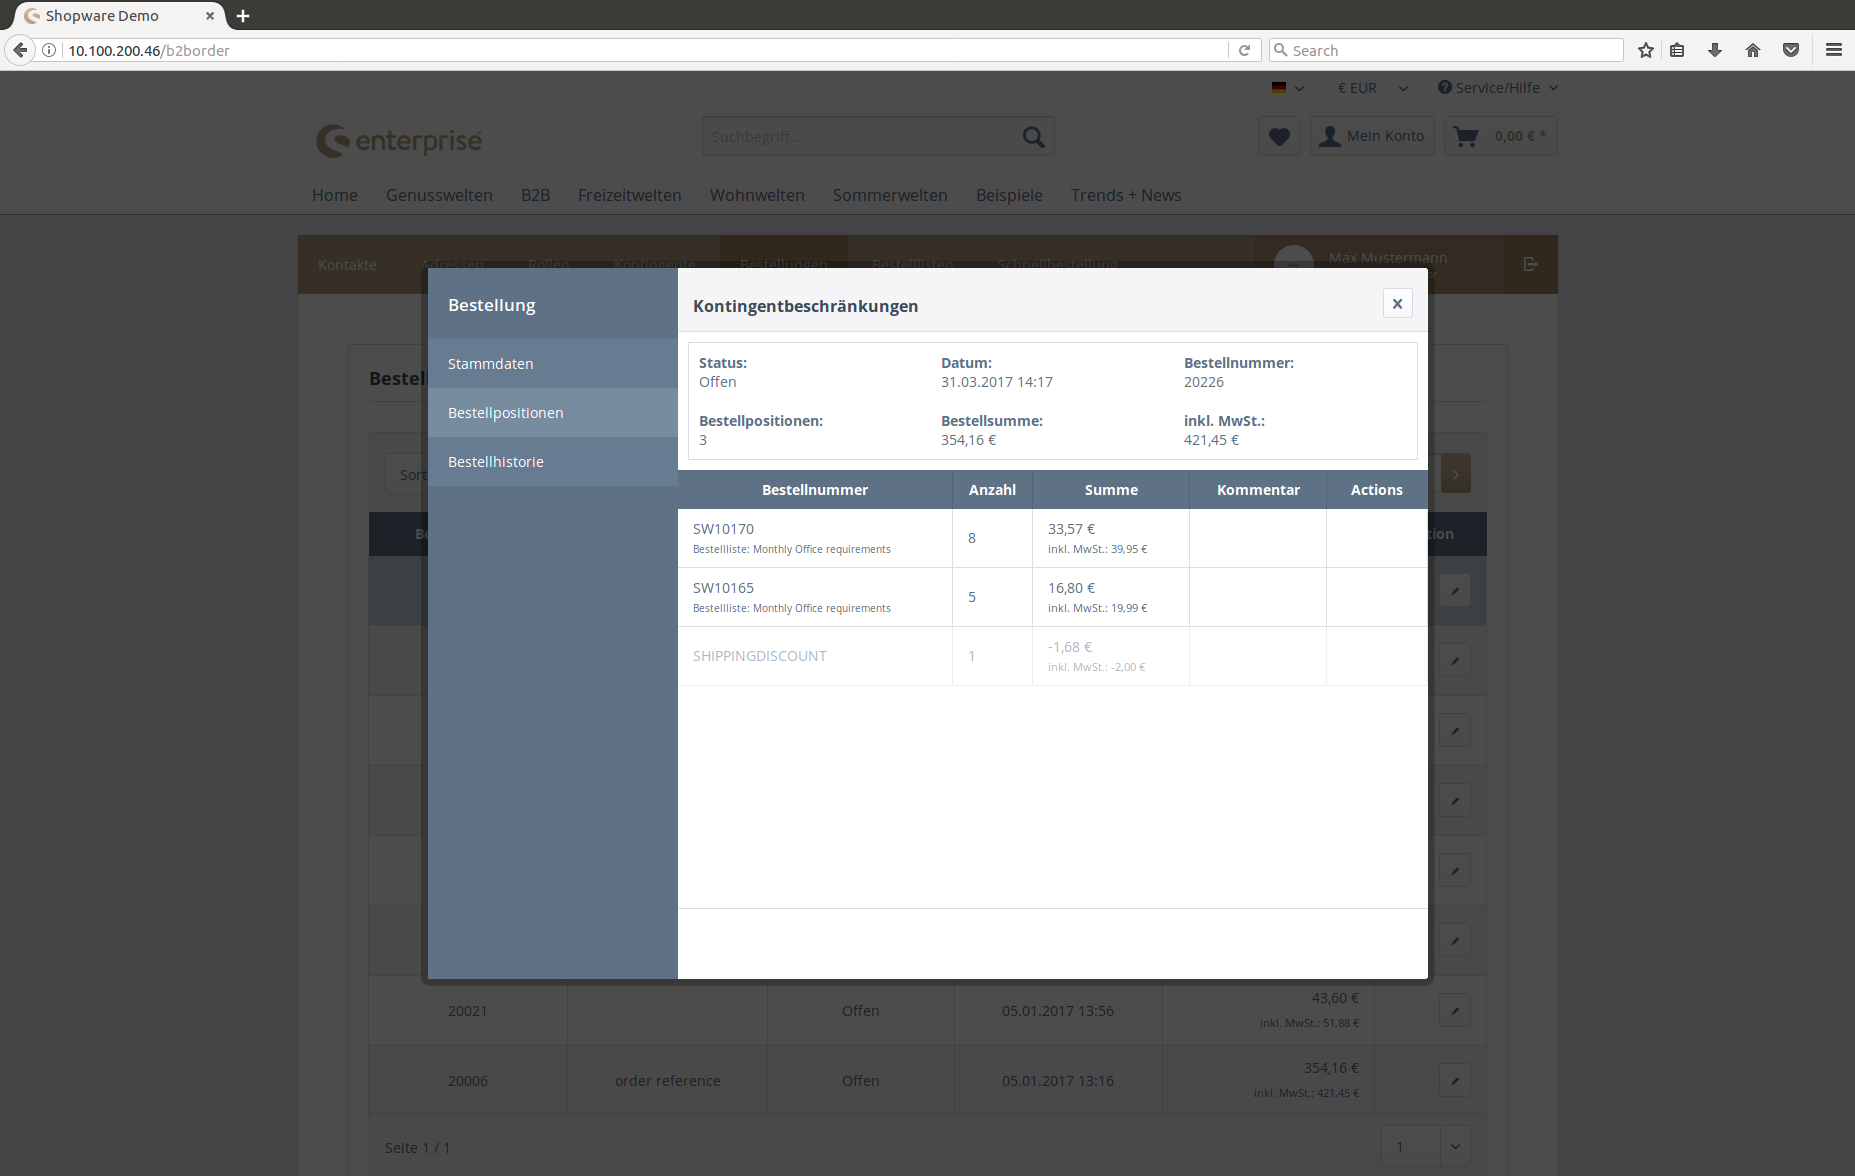
Master Data
After clicking, a modal window opens with all relevant data from the order.
The order reference number and requested delivery date is editable for temporary orders.
The user can can always change the comment.
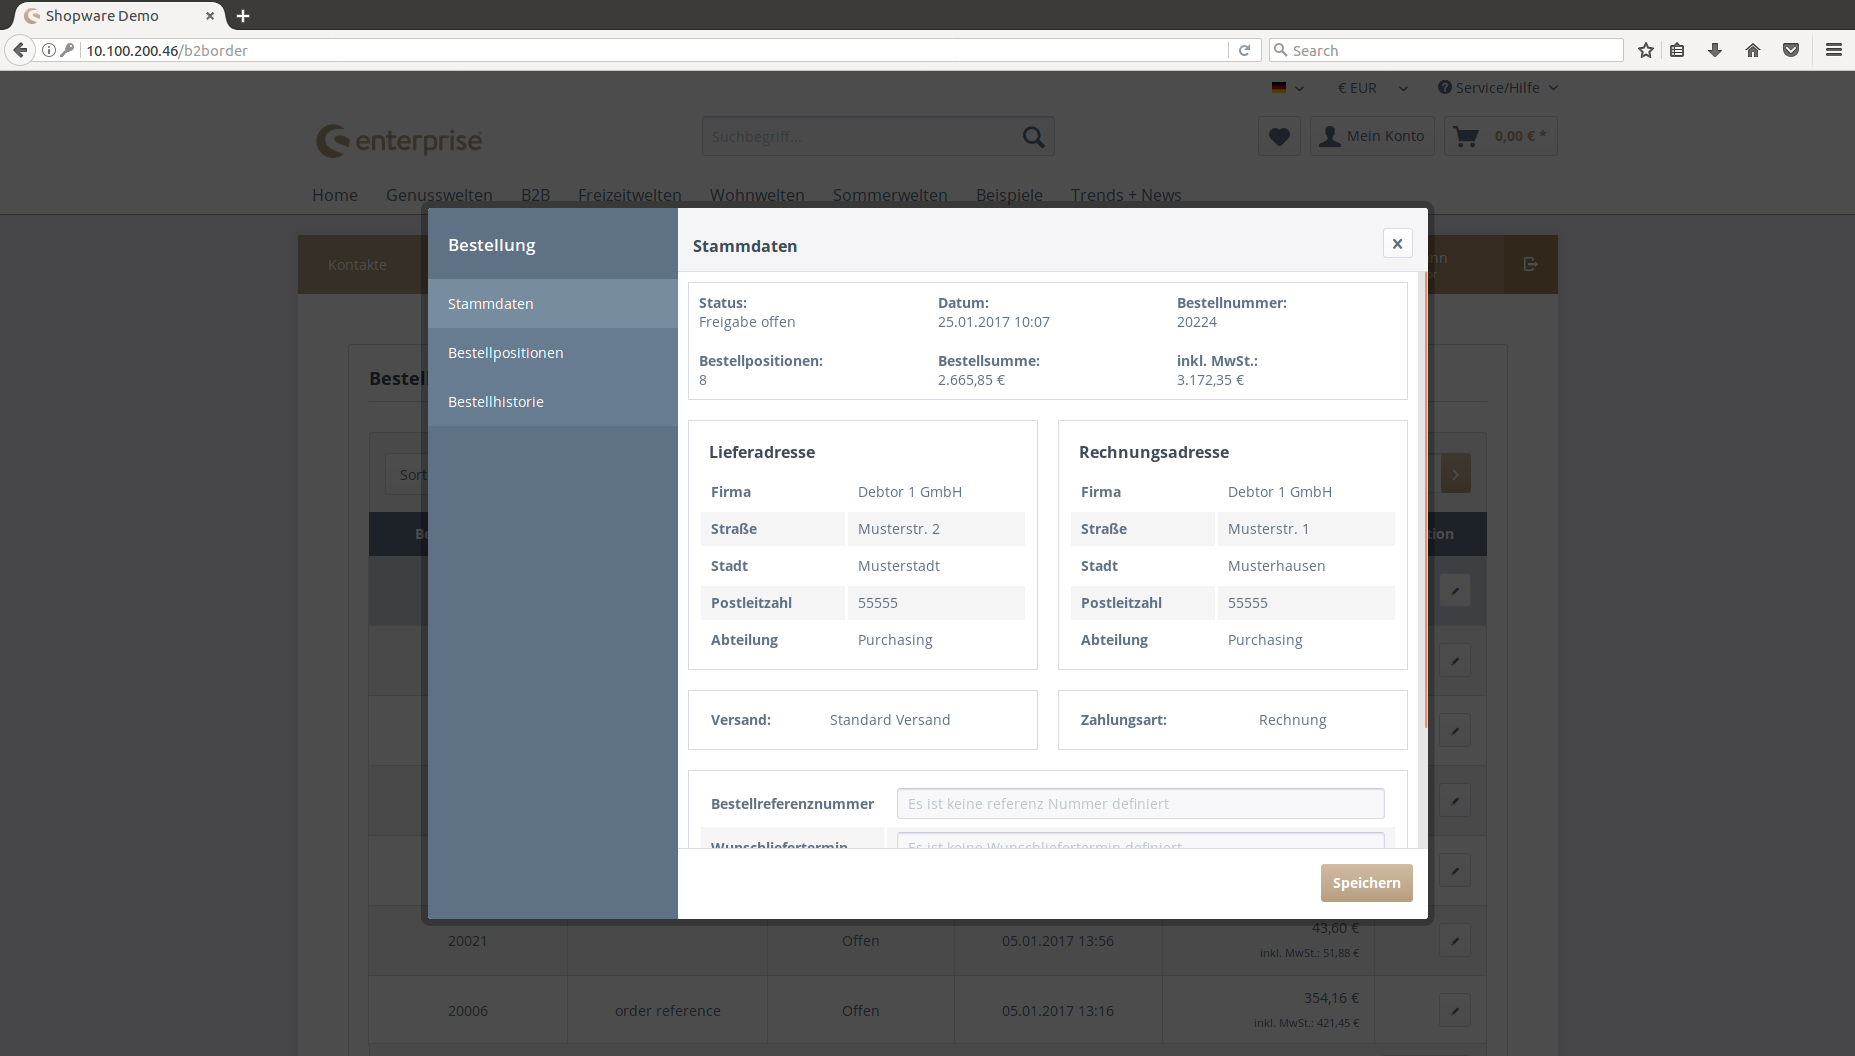
If the user is placing the order with products from an order list, a short info will be shown.
Positions
In temporary orders, users can add, delete or modify the normal products (mode = 0) with the buttons.
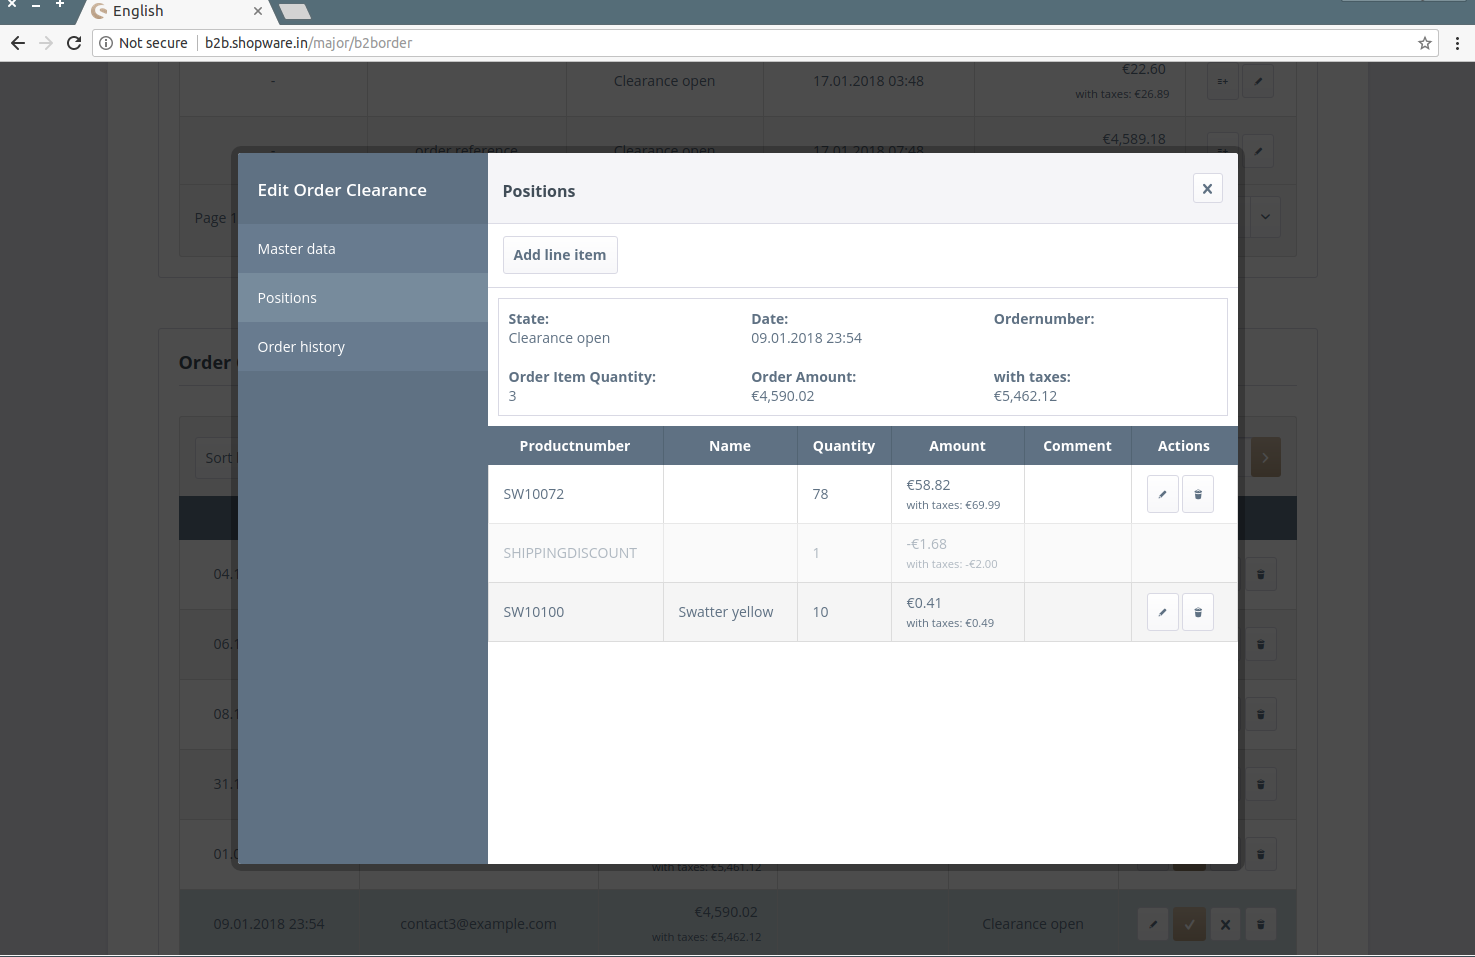
The button Add Line Item triggers the process to add an Product with a specific quantity and comment to the order clearance.
Deleting is done by clicking the delete button in the row. Through editing, a user can change a position´s quantity and write a comment.
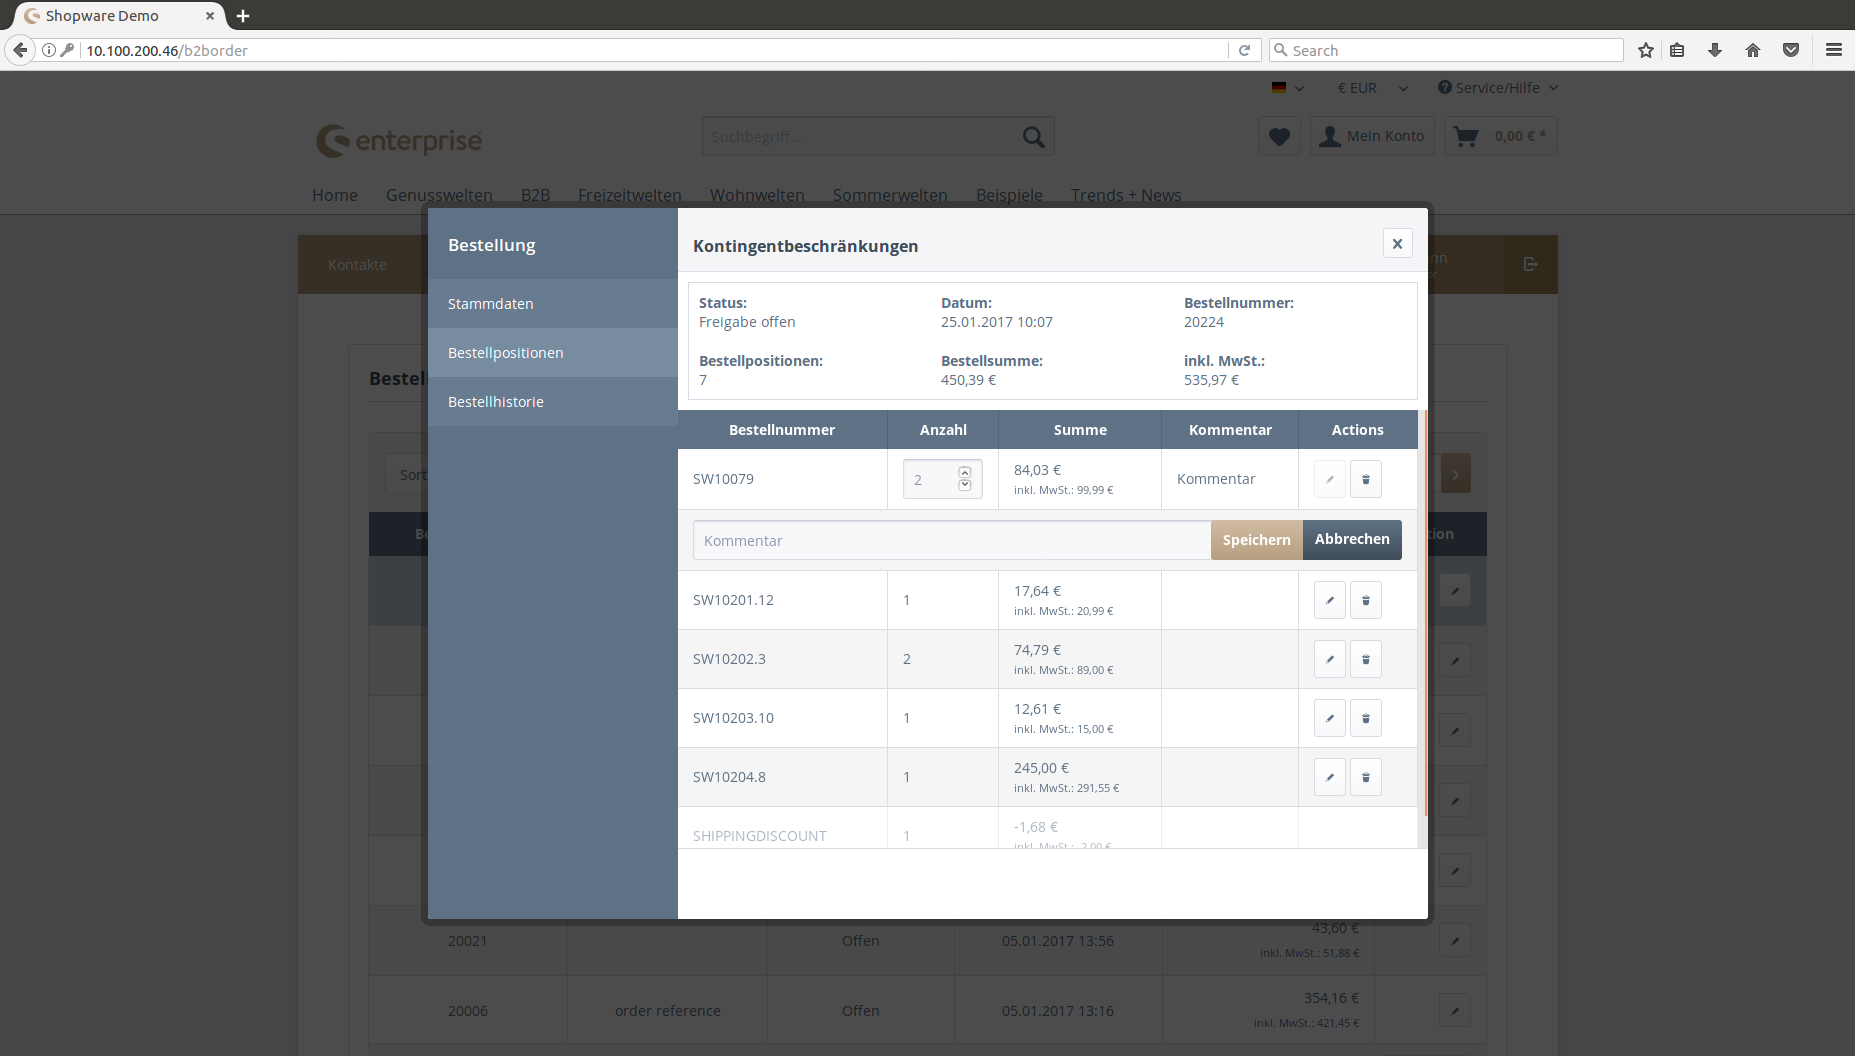
Positions from permanent orders cannot be changed.
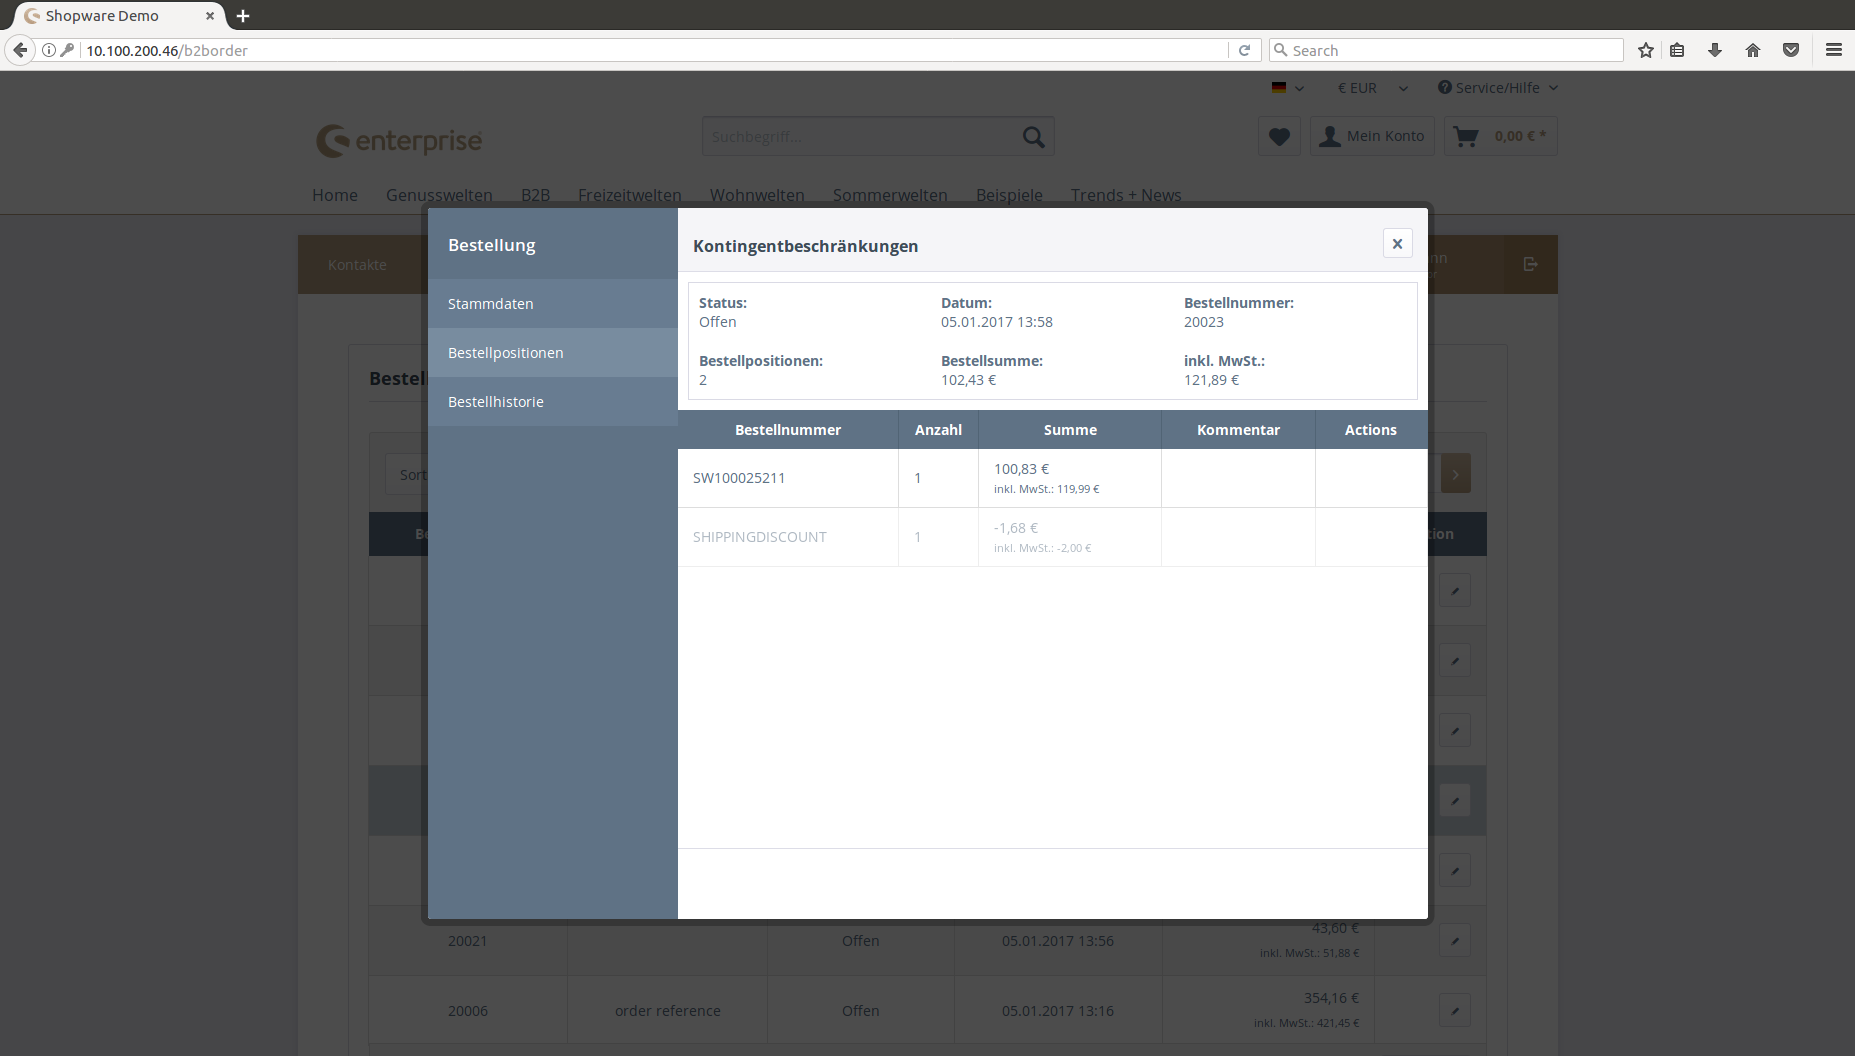
If the user is placing the order with products from an order list, a short info will be shown.
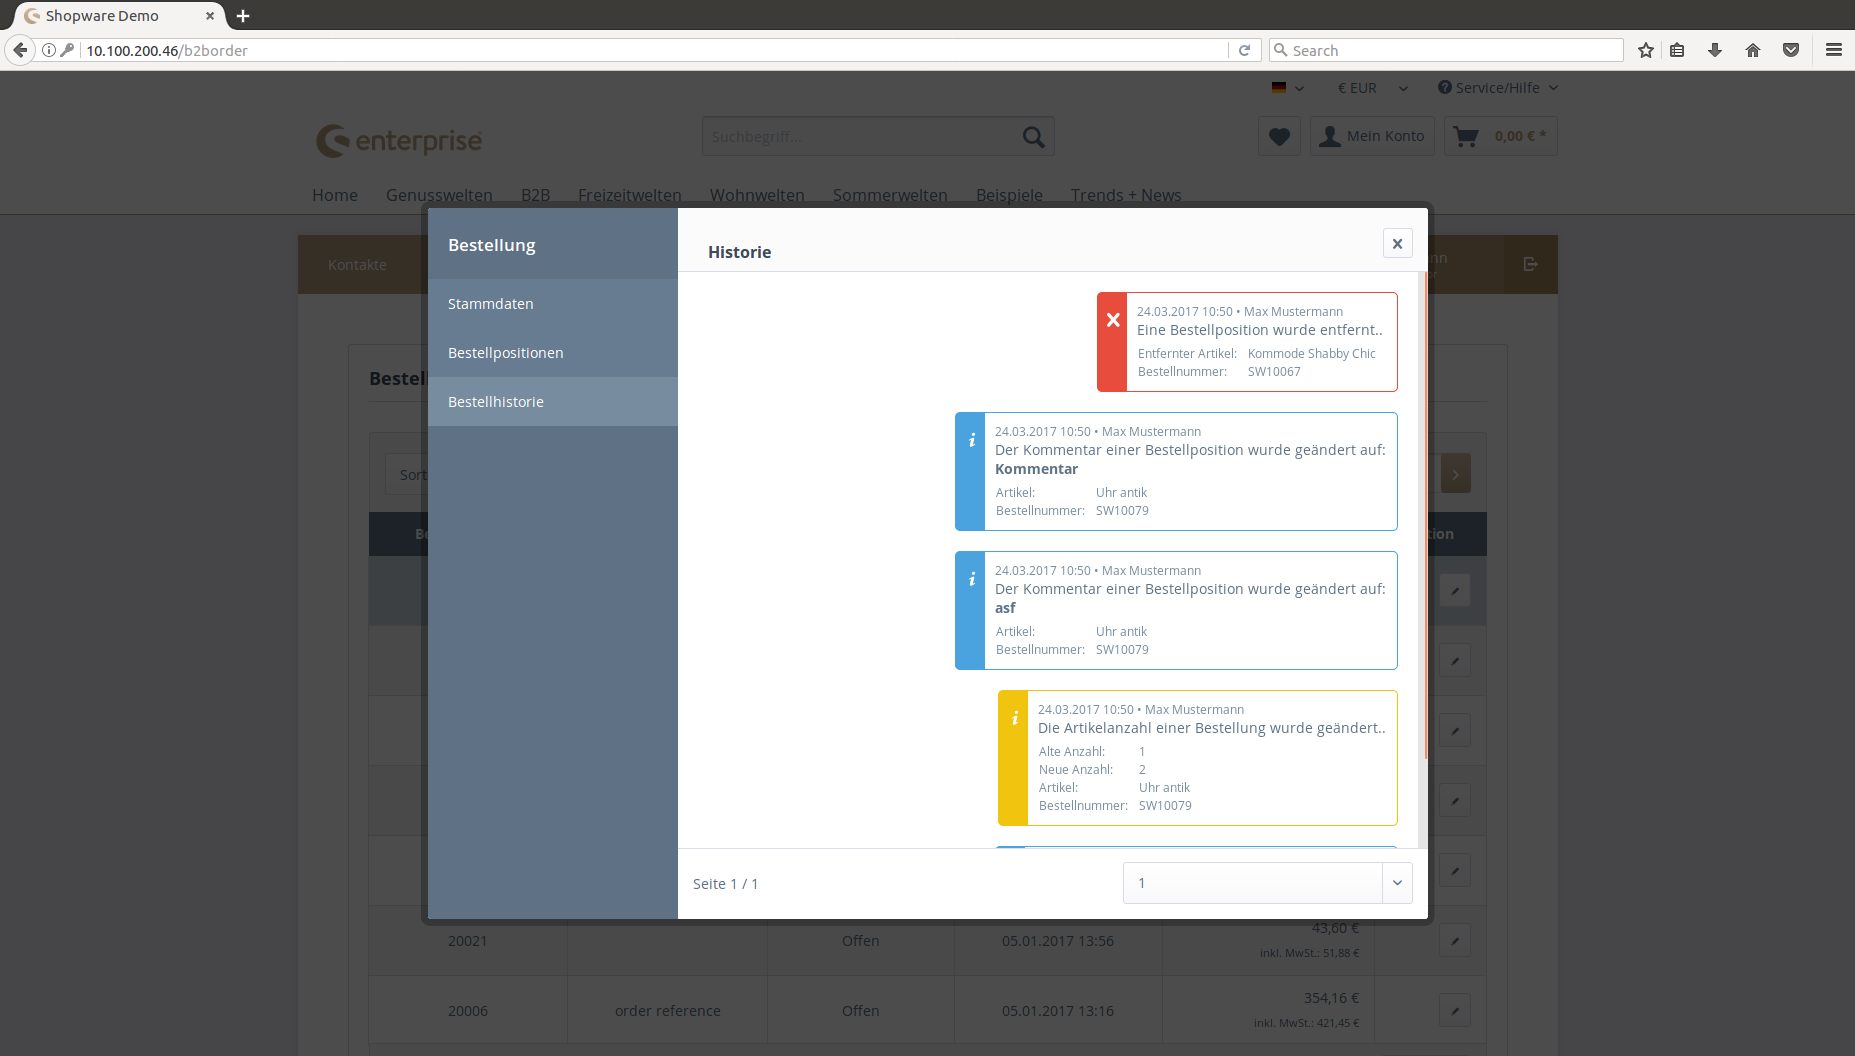
History
Every change from the order is logged and listed in the history.
Order reference number and requested delivery date in order confirmation mail
The B2B-Suite enriches orders with additional order data. For example, it is possible to define a custom order reference number and requesting a delivery date in the checkout. These data are also possible to view in the order confirmation mail.
B2B-Suite for Shopware 5
In this version, the mail confirmation template will be extended automatically. If you use a custom mail template, you should check your template, because the structure could slip after running the migration, which extends the template.
How to check and modify your template
Hover over the settings tab in the backend and click on "mail templates" at "mail management" to get a new window with all mail templates. Then you click on "system mails" and select the "sOrder" template. There you can modify the plain and HTML content to change the order or structure of your mail contents. The B2B-Suite extension should look like:
{if $orderReference}
    Order reference number: {$orderReference}
{/if}
{if $requestedDeliveryDate}
    Requested delivery date: {$requestedDeliveryDate}
{/if}
How to modify your template
Click on the settings tab in the administration and choose "Email templates" at the "Shop" settings. Then edit the mail template with the "Order confirmation" type. There you can modify the content of your mail in plain and HTML text.
For the B2B-Suite order template extension you have to add these snippets into your content depending on the type of text:
Plain text
{% if order.customFields.b2bOrderReferenceHolder is defined and order.customFields.b2bOrderReferenceHolder != '' %}
    Order reference number: {{ order.customFields.b2bOrderReferenceHolder }}
{% endif %}
{% if order.customFields.b2bDeliveryDateHolder is defined and order.customFields.b2bDeliveryDateHolder != '' %}
    Requested delivery date: {{ order.customFields.b2bDeliveryDateHolder }}
{% endif %}
HTML text
{% if order.customFields.b2bOrderReferenceHolder is defined and order.customFields.b2bOrderReferenceHolder != '' %}
    <b>Order reference number:</b> {{ order.customFields.b2bOrderReferenceHolder }}<br>
{% endif %}
{% if order.customFields.b2bDeliveryDateHolder is defined and order.customFields.b2bDeliveryDateHolder != ''%}
    <b>Requested delivery date:</b> {{ order.customFields.b2bDeliveryDateHolder }}
{% endif %}