Backend Components - Listing
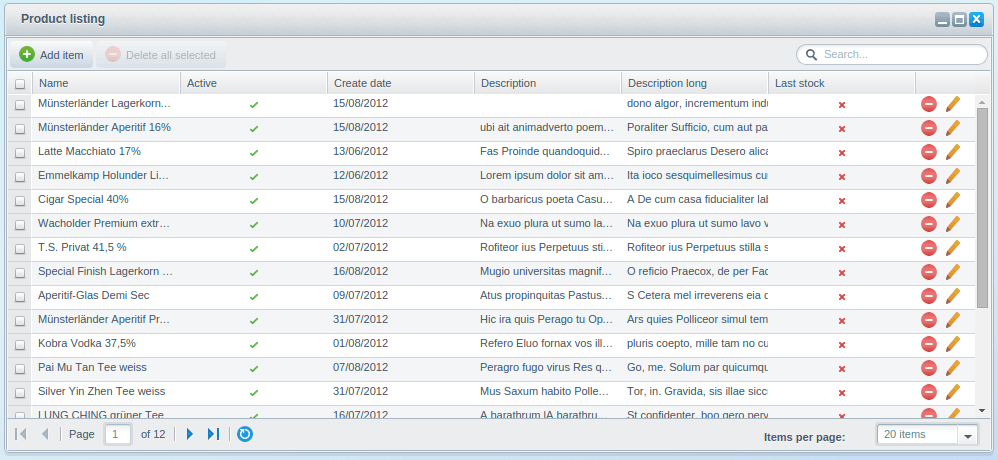
This tutorial is part of a series that covers the Shopware Backend Components. In the last tutorial Backend Components - Basics we covered the implementation of a simple product listing. In this tutorial, you'll learn the basics of the listing and get a little example of it. For this, the Shopware.grid.Panel and Shopware.window.Listing components will be explained in more detail.
We will take the plugin result from the last tutorial as basis for this tutorial. If you don't have it already, you can download this plugin here: SwagProductBasic.zip
The Shopware.grid.Panel for the listing was implemented in Resources/views/backend/swag_product_listing/view/list/product.js.
The Shopware.window.Listing in Resources/views/backend/swag_product_listing/view/list/window.js.
Shopware.window.Listing Basics
The Shopware.window.Listing component, hereinafter referred to as listing window, does not contain many configuration options and therefore it's quickly explained. The listing window is usually used as startup window of an application and has been defined in our main controller last time. As requirements you have the listingGrid and listingStore property. Here you have to define the class names of our Shopware.grid.Panel and Shopware.store.Listing.
Ext.define('Shopware.apps.SwagProductListing.view.list.Window', {
    extend: 'Shopware.window.Listing',
    alias: 'widget.product-list-window',
    height: 340,
    width: 600,
    title : '{s name=window_title}Product listing{/s}',

    configure: function() {
        return {
            listingGrid: 'Shopware.apps.SwagProductListing.view.list.Product',
            listingStore: 'Shopware.apps.SwagProductListing.store.Product'
        };
    }
});
The defined listing store will be created while instantiating the listing window using the createListingStore() method. If you don't define any, you'll get the following error message:
The Shopware.grid.Panel will be created by the createGridPanel() method and will be added to the items property of the listing window. In addition, the created Shopware.grid.Panel will also be available in the listing window as a property called gridPanel. This makes it easier to access the component later on. If there is no listingGrid defined, you'll get the following error message:
Further configuration options of the Shopware.window.Listing will be covered in the upcoming tutorials.
Shopware.grid.Panel Basics
In this part of the tutorial we'll cover the basics of how the Shopware.grid.Panel works behind the scenes. First we'll show you the column generation and configuration. Further down, there will be examples of how to work with the events fired by the grid.
Column Generation
The Shopware.grid.Panel expects a Ext.data.Store which contains Ext.data.Model instances. The model will be the basis for the generation of the column. By default, you should create every field manually except for the id property. This should result in a faster application:
Ext.define('Shopware.apps.SwagProductListing.model.Product', {
   fields: [
      { name : 'id', type: 'int', useNull: true },
      { name : 'name', type: 'string' },
      { name : 'active', type: 'boolean' },
      { name : 'createDate', type: 'date' },
      { name : 'description', type: 'string' },
      { name : 'descriptionLong', type: 'string' },
      { name : 'lastStock', type: 'boolean' }
   ]
});
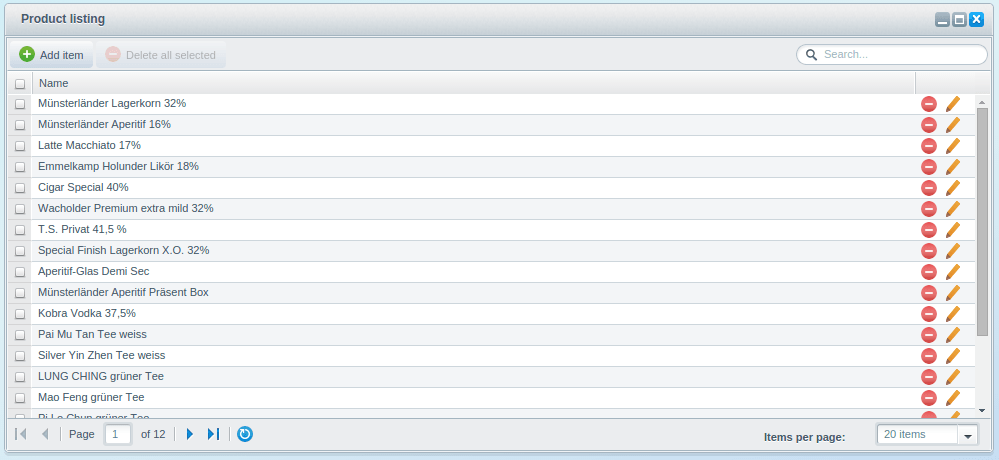
Limit displayed fields
Based on the field types of your model, different default Shopware columns will be created. Because a model can contain many more fields than those seen above, you can decide whether a certain field should be displayed or not. To do so, you can set the property columns within the configure() method. As soon as the property columns is defined, only the provided fields will be created and displayed. The columns property is defined as an object based on a key/value schema where the key represents the field name like name:
Ext.define('Shopware.apps.SwagProductListing.view.list.Product', {
    extend: 'Shopware.grid.Panel',
    configure: function() {
        return {
            columns: {
                name: {  }
            }
        };
    }
});
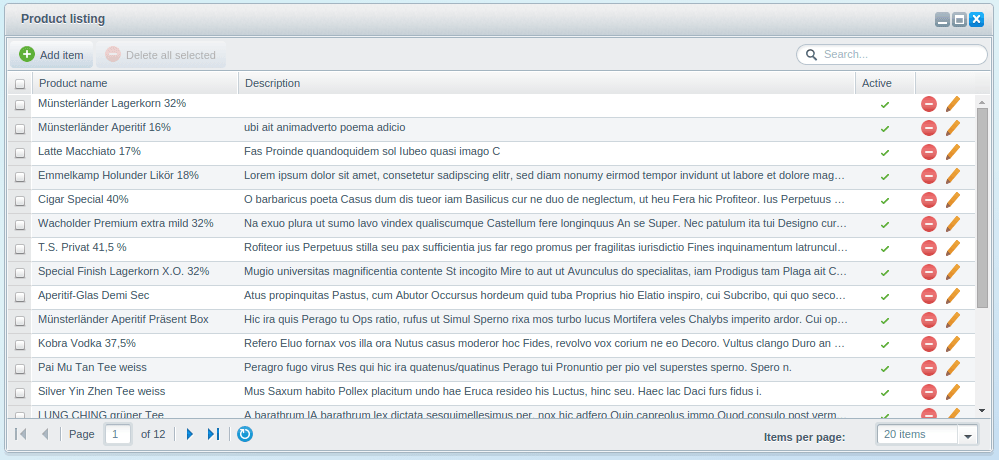
Extended field configuration
The columns property may not only be used for limitation - it can also be used to configure the way in which the field is displayed.
The first configuration option is the sorting of the shown columns. The Shopware.grid.Panel creates the columns in the order of their declaration. Second, you can define field specific configurations, like a renderer method or translations, by providing an object like seen below:
Ext.define('Shopware.apps.SwagProductListing.view.list.Product', {
    extend: 'Shopware.grid.Panel',
    configure: function() {
        return {
            columns: {
                name: { header: 'Product name' },
                description: { flex: 3 },
                active: { width: 60, flex: 0 }
            }
        };
    }
});
Renderer Method
But this is not the only way to configure a column. You can also provide a function which returns the column:
Ext.define('Shopware.apps.SwagProductListing.view.list.Product', {
    extend: 'Shopware.grid.Panel',
    configure: function() {
        return {
            columns: {
                name: this.createNameColumn
            }
        };
    },

    createNameColumn: function(model, column) {
        column.header = 'Product name';
        return column;
    }
});
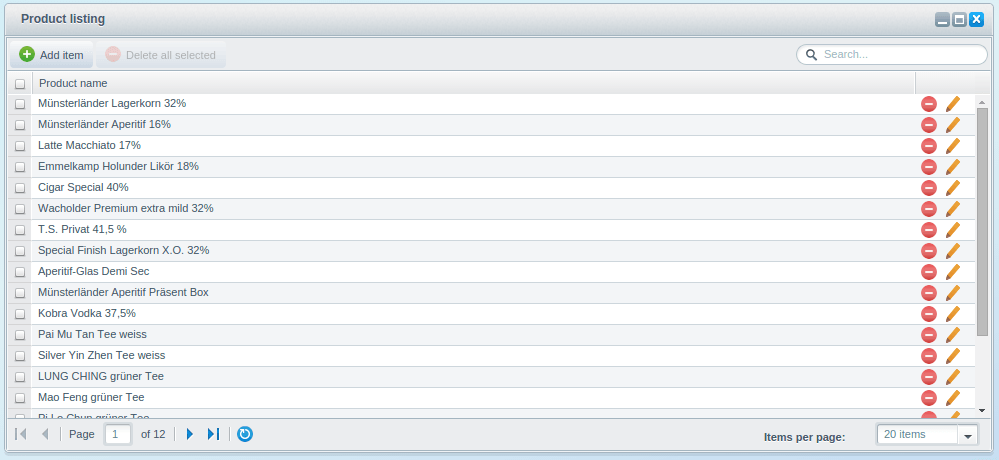
Shorthand
In the configuration above, the header property of the column name has been modified to change the name of the column header. There is also a shorthand for that. Instead of providing an object, you can provide a string which will be the column header. You can even use that shorthand for translations:
Ext.define('Shopware.apps.SwagProductListing.view.list.Product', {
    extend: 'Shopware.grid.Panel',
    configure: function() {
        return {
            columns: {
                name: 'Product name'
            }
        };
    }
});
Feature Configuration
The Shopware.grid.Panel also has features like a toolbar and their children elements. This feature can be activated or deactivated. Every Shopware.grid.Panel feature has its own activation parameter:
Ext.define('Shopware.apps.SwagProductListing.view.list.Product', {
    extend: 'Shopware.grid.Panel',
    configure: function() {
        return {
            columns: { name: 'Product name' },
            toolbar: false
        };
    }
});
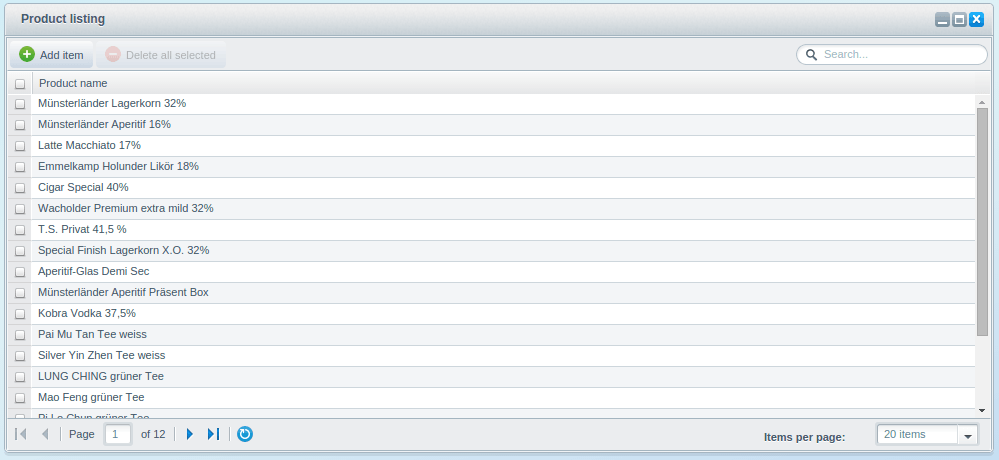
Example: Disable add button and hide search field
Ext.define('Shopware.apps.SwagProductListing.view.list.Product', {
    extend: 'Shopware.grid.Panel',
    configure: function() {
        return {
            columns: { name: 'Product name' },
            addButton: false,
            searchField: false
        };
    }
});

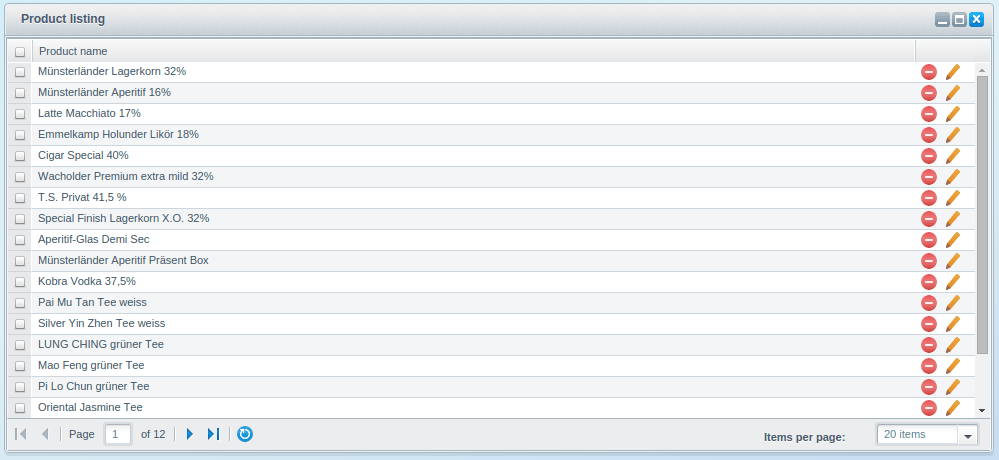
Example: Hide action column
Ext.define('Shopware.apps.SwagProductListing.view.list.Product', {
    extend: 'Shopware.grid.Panel',
    configure: function() {
        return {
            columns: { name: 'Product name' },
            actionColumn: false
        };
    }
});
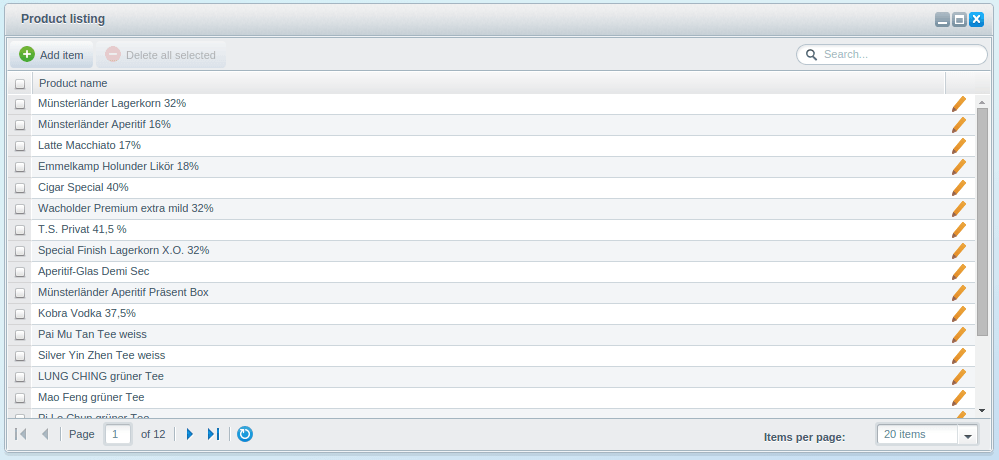
Example: Hide delete column
Ext.define('Shopware.apps.SwagProductListing.view.list.Product', {
    extend: 'Shopware.grid.Panel',
    configure: function() {
        return {
            columns: { name: 'Product name' },
            deleteColumn: false
        };
    }
});
Event Handling
The event handling of the Shopware.grid.Panel is managed by the Shopware.grid.Controller. This controller will be created and mapped by the Shopware.grid.Panel automatically. To prevent duplicated event names, every event will be prefixed. The prefix will be determined by the Shopware.grid.Panel, based on the last part of the name of the store.
Example:
The given store contains the configured model Shopware.app.SwagProduct.model.Product. The event prefix will then be product.
All event are prefixed like this:
- product-add-item
- product-delete-items
- product-search
- ...
The Shopware.grid.Controller catches these events and performs the default actions for the appropriate event. In the Backend Component - Batch Processes you will learn how to deactivate or extend the Shopware default controller.
How to extend
In this section of the tutorial you will learn how to easily extend the Shopware.grid.Panel.
You can extend the Shopware.grid.Panel with either one of the following ways:
- through override of the methods
- through the ExtJS event system
The following examples will show you both ways. To use the ExtJS event system, you need your own ExtJS Controller. Here, we use our main controller, swag_product_listing/controller/main.js.
Add custom action column
The action column of the Shopware.grid.Panel will be created by the createActionColumn() method. The actual elements of the action column will be created by the createActionColumnItems() method:
createActionColumnItems: function () {
    var me = this, items = [];

    me.fireEvent(me.eventAlias + '-before-create-action-column-items', me, items);

    if (me.getConfig('deleteColumn')) {
        items.push(me.createDeleteColumn());
    }
    if (me.getConfig('editColumn')) {
        items.push(me.createEditColumn());
    }

    me.fireEvent(me.eventAlias + '-after-create-action-column-items', me, items);

    return items;
},
To add a new column, you can easily just override the method of the Shopware.apps.SwagProductListing.view.list.Product component or subscribe to the product-after-create-action-column-items event in the main controller:
Through method overriding
Ext.define('Shopware.apps.SwagProductListing.view.list.Product', {
    extend: 'Shopware.grid.Panel',
    alias:  'widget.product-listing-grid',
    region: 'center',

    createActionColumnItems: function () {
        var me = this,
            items = me.callParent(arguments);

        items.push({
            action: 'notice',
            iconCls: 'sprite-balloon',
            handler: function (view, rowIndex, colIndex, item, opts, record) {
                Shopware.Notification.createGrowlMessage(undefined, 'Grid panel custom logic performed');
            }
        });
        return items;
    }
});
Through the event system
Ext.define('Shopware.apps.SwagProductListing.controller.Main', {
    extend: 'Enlight.app.Controller',
    init: function() {
        var me = this;
        me.control({
            'product-listing-grid': {
                'product-after-create-action-column-items': me.addActionColumn
            }
        });
        me.mainWindow = me.getView('list.Window').create({ }).show();
    },

    addActionColumn: function(gridPanel, items) {
        items.push({
            action: 'notice',
            iconCls: 'sprite-balloon',
            handler: function (view, rowIndex, colIndex, item, opts, record) {
                Shopware.Notification.createGrowlMessage('', 'Main controller custom logic performed');
            }
        });
        return items;
    }
});
Implement your own toolbar button
The toolbar in the Shopware.grid.Panel will be created by the createToolbar() method. Its child elements will be created by the createToolbarItems() method.
createToolbarItems: function () {
    var me = this, items = [];

    me.fireEvent(me.eventAlias + '-before-create-toolbar-items', me, items);

    if (me.getConfig('addButton')) {
        items.push(me.createAddButton());
    }
    if (me.getConfig('deleteButton')) {
        items.push(me.createDeleteButton())
    }

    me.fireEvent(me.eventAlias + '-before-create-right-toolbar-items', me, items);

    if (me.getConfig('searchField')) {
        items.push('->');
        items.push(me.createSearchField());
    }

    me.fireEvent(me.eventAlias + '-after-create-toolbar-items', me, items);

    return items;
},
To accomplish this task by using the override method way, you need to use the function Ext.Array.insert() which can add items to a specific position in an array.
The event system example will use the product-before-create-right-toolbar-items event:
Through method overriding
Ext.define('Shopware.apps.SwagProductListing.view.list.Product', {
    extend: 'Shopware.grid.Panel',
    alias:  'widget.product-listing-grid',
    region: 'center',

    createToolbarItems: function() {
        var me = this,
            items = me.callParent(arguments);

         items = Ext.Array.insert(
             items,
             2,
             [ me.createToolbarButton() ]
         );

        return items;
    },

    createToolbarButton: function() {
        return Ext.create('Ext.button.Button', {
            text: 'Custom button'
        });
    }
});
Through the event system
Ext.define('Shopware.apps.SwagProductListing.controller.Main', {
    extend: 'Enlight.app.Controller',
    init: function() {
        var me = this;
        me.control({
            'product-listing-grid': {
                'product-before-create-right-toolbar-items': me.addToolbarButton
            }
        });
        me.mainWindow = me.getView('list.Window').create({ }).show();
    },

    addToolbarButton: function(grid, items) {
        items.push(this.createToolbarButton());
        return items;
    },

    createToolbarButton: function() {
        return Ext.create('Ext.button.Button', {
            text: 'Custom button'
        });
    }
});
Create an additional column
Last, we want to create an additional column which is not defined in our model. Because of this, the Shopware.grid.Panel cannot create a column automatically.
The additional column should display a check mark and indicate if an item of our shop has been created in the month of July.
The columns of the Shopware.grid.Panel will be created by the createColumns() method:
createColumns: function () {
    var me = this, model = null,
        column = null,
        configColumns = me.getConfig('columns'),
        columns = [];

    model = me.store.model.$className;

    if (model.length > 0) {
        model = Ext.create(model);
    }

    me.fireEvent(me.eventAlias + '-before-create-columns', me, columns);

    if (me.getConfig('rowNumbers')) {
        columns.push(me.createRowNumberColumn());
    }

    var keys = model.fields.keys;
    if (Object.keys(configColumns).length > 0) keys = Object.keys(configColumns);

    Ext.each(keys, function(key) {
        var modelField = me.getFieldByName(model.fields.items, key);
        column = me.createColumn(model, modelField);

        //column created? then push it into the columns array
        if (column !== null) columns.push(column);
    });

    me.fireEvent(me.eventAlias + '-before-create-action-columns', me, columns);

    if (me.getConfig('actionColumn')) {
        column = me.createActionColumn();
        if (column !== null) {
            columns.push(column);
        }
    }

    me.fireEvent(me.eventAlias + '-after-create-columns', me, columns);

    return columns;
}
To implement this, you have to either override the createColumns() method or use the event product-before-create-action-columns:
Through method overriding
Ext.define('Shopware.apps.SwagProductListing.view.list.Product', {
    extend: 'Shopware.grid.Panel',
    alias:  'widget.product-listing-grid',
    region: 'center',

    createColumns: function() {
        var me = this,
            columns = me.callParent(arguments);

        var column = {
            xtype: 'gridcolumn',
            header: 'Created in july',
            renderer: me.columnRenderer,
            sortable: false,
            dataIndex: 'inJuly'
        };

        columns = Ext.Array.insert(
            columns,
            columns.length - 1,
            [ column ]
        );

        return columns;
    },

    columnRenderer: function(value, metaData, record) {
        var date = record.get('createDate');
        return this.booleanColumnRenderer((date.getMonth() === 6));
    }
});
Through the event system
Ext.define('Shopware.apps.SwagProductListing.controller.Main', {
    extend: 'Enlight.app.Controller',
    init: function() {
        var me = this;
        me.control({
            'product-listing-grid': {
                'product-before-create-action-columns': me.addColumn

            }
        });
        me.mainWindow = me.getView('list.Window').create({ }).show();
    },

    addColumn: function(grid, columns) {
        var me = this;

        columns.push({
            xtype: 'gridcolumn',
            header: 'Created in july',
            renderer: me.columnRenderer,
            sortable: false,
            dataIndex: 'inJuly'
        });

        return columns;
    },

    columnRenderer: function(value, metaData, record) {
        var date = record.get('createDate');
        return this.booleanColumnRenderer((date.getMonth() === 6));
    }
});
This example contains a particular feature, the booleanColumnRenderer method. This method is used by both examples and is declared in neither the Shopware.grid.Panel nor Enlight.app.Controller. That is because this method is a helper method, declared in the helper class Shopware.model.Helper. This class will be included in every component using mixins. Therefore you can access all of the helper method inside your model on the this scope. The booleanColumnRenderer() method is one of these methods.
Plugin Download - SwagProductListing.zip
Congratulations! You've just created your first customized listing component using Shopware backend components. You now have learned how to completely customize and extend the listing window in your plugin.
Further Tutorials
The next tutorial will cover the implementation and customization of the detail window.
Proceed to Backend Components - Detail.