Example - Custom listing page
Introduction
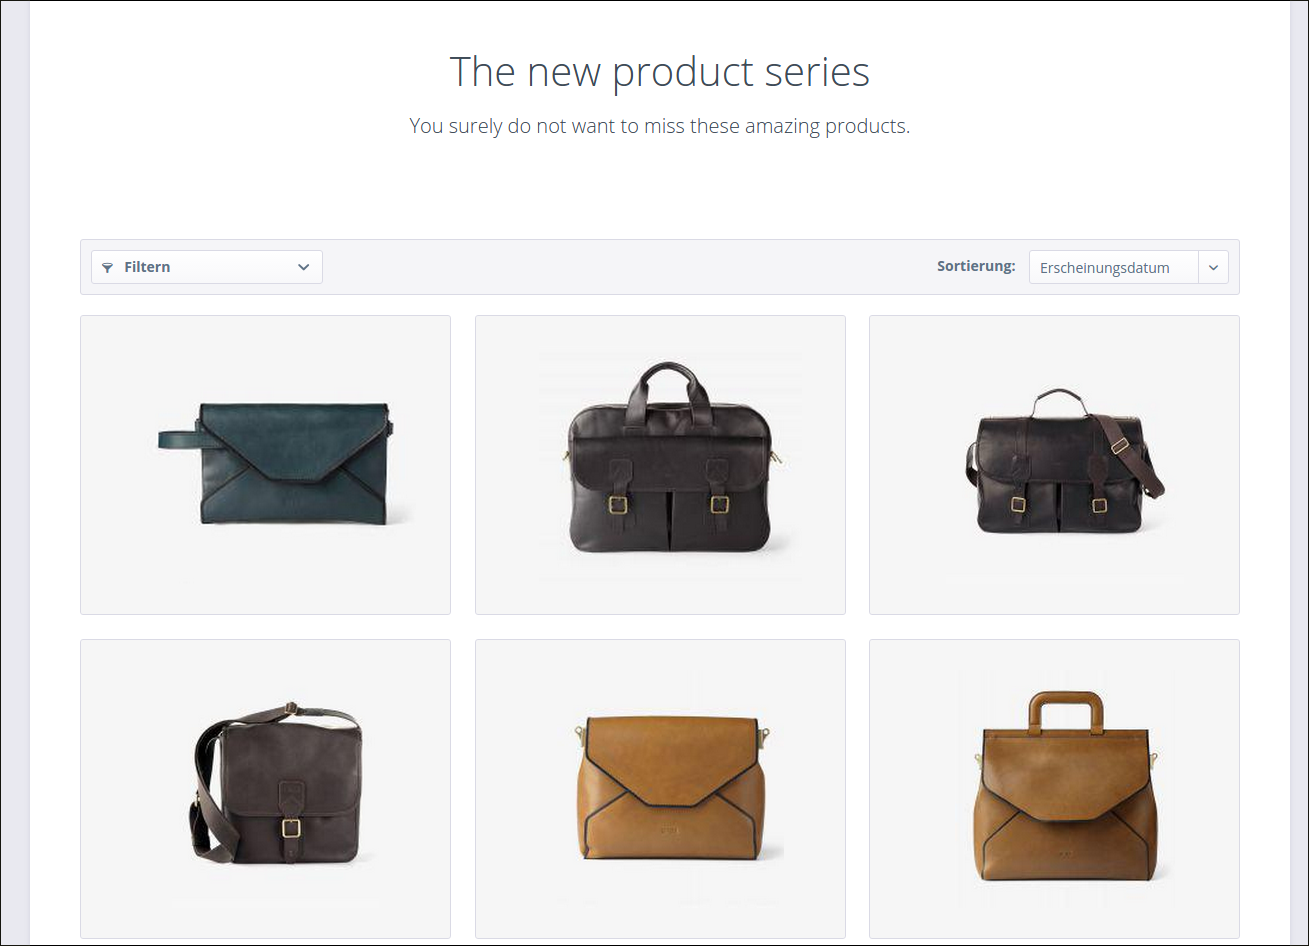
In this tutorial you will learn how to create your own custom template for category listing pages. In this example we want to customize the CMS content, replace the default product listing, extend the default product box and add a few styling adjustments. This custom template can be used for products (or product streams) that should be distinctively presented, like a new clothing series.
Preparation
First of all we have to create a new template file inside the frontend/listing directory of our own theme. The directory of the file is very important for the inheritance system of Shopware and has to be correct in order to work properly. In this tutorial we'll name the file custom_listing.tpl:
CustomListing
 └── frontend
     └── listing
         └── custom_listing.tpl
Then we extend our new template from frontend/listing/index.tpl:
{extends file='parent:frontend/listing/index.tpl'}
We will add some custom LESS/CSS modifications later. Therefore, we add a wrapping element with an individual custom-detail class as a container class:
{block name='frontend_index_content'}
    <div class="custom-listing">
        {$smarty.block.parent}
    </div>
{/block}
Structure
Exclude elements
We will manually exclude the sidebar and the topseller-slider from our custom listing template by overwriting the specific blocks with empty content. These are the blocks that contain the specific definitions:
{block name='frontend_index_content_left'}
{/block}

{block name="frontend_listing_index_topseller"}
{/block}
CMS content
We want to overwrite the default CMS content output of the listing and implement some custom markup and styling to it. This is the original block we will overwrite to add our new CMS markup:
{block name="frontend_listing_index_text"}
The CMS content that can be added to a category in the backend is optional, so in order to not display an empty element if no content is added, we will create a prompt that checks if the cmsHeadline or cmsText contain any information.
{if $sCategoryContent.cmsHeadline || $sCategoryContent.cmsText}
    <div class="custom-listing--intro">
        <h1 class="intro--cmsHeadline">{$sCategoryContent.cmsHeadline}</h1>
        <span class="intro--cmsText">{$sCategoryContent.cmsText}</span>
    </div>
{/if}
Actual listing
We will overwrite the default listing and include our own customized product box for each article inside the category. This is the block that handles the iteration through the $sArticles variable, which contains all articles that are accessible on the current page:
{block name="frontend_listing_list_inline"}
We will simply overwrite the default listing block and add our own iteration through the products with an {foreach} tag. For every article that is found we will include a custom product box, that we will create next. We also define the $productBoxLayout variable of Shopware as custom:
{block name="frontend_listing_list_inline"}
    {$productBoxLayout = "custom"}
    <div class="custom-listing--listing">
        {foreach $sArticles as $sArticle}
            {include file="frontend/listing/box-custom.tpl"}
        {/foreach}
    </div>
{/block}
Custom product box
The new product box is separated into its own box-custom.tpl file and extends the default box-basic product box of the bare theme. When we added the {extends} command of Smarty and chose the correct path, we can now overwrite every part of the product box inside our newly created file:
{extends file="parent:frontend/listing/product-box/box-basic.tpl"}
When we take a look at the box-basic.tpl file of the bare theme, we can find the frontend_listing_box_article block that contains the whole content of the product box. We will take that block and overwrite it completely:
{block name="frontend_listing_box_article_content"}
After defining the block we are ready to add some markup to our template file. We can adopt the box--content element and the helper class is--rounded that adds a border radius to the product box. Inside the box--content element we will add an <a>, which will later be the hovering layer. We also add some additional information like the articleName and price properties. The article image will be included from the bare theme with the {include file="parent: ... "} tag, with which you can import partials of the inherited theme:
<div class="box--content is--rounded">
    <a class="box-custom--info" href="{$sArticle.linkDetails|rewrite:$sArticle.articleName}">
        <div class="info--wrapper">
        <span class="info--name">
            {$sArticle.articleName|escape}
        </span>
        <span class="info--price">
            {$sArticle.price|currency}
        </span>
        </div>
    </a>

    <div class="box-custom--image">
        {include file="parent:frontend/listing/product-box/product-image.tpl"}
    </div>
</div>
Styling
The structural changes that we added require a styling adjustment in the frontend in order to work and look correctly. We will add two new less files to our theme, first the required all.less file and a custom-listing.less which will contain our style adjustments. The all.less file is automatically recognized by Shopware and all we need to do is import our new created file.
CustomListingTheme
 └── frontend
     └── _public
         └── src
             └── less
                 ├── all.less
                 └── custom-listing.less
Don't forget to import the custom-listing stylesheet into the all.less file:
@import "custom-listing";
To ensure that our styling adjustments are only applied on the custom detail page, we wrap our code inside the class we have created before:
.custom-listing {
    // Custom styling here
}
Styling the CMS header
Here we add a bit of styling to our CMS header content.
.custom-listing--cms {
    .unitize(margin-bottom, 100);

    .cms--headline {
        .unitize(font-size, 40);
        .unitize(line-height, 45);
        font-weight: 300;
        text-align: center;
    }

    .cms--text h2 {
        .unitize(font-size, 20);
        font-weight: 300;
        margin: 0;
        text-align: center;
    }
}
Changing the default product box behavior
When our custom product box is active, we want to change the responsive behavior of the product boxes and define new breakpoints. In order to do that, we will use media queries for the specific viewports that are defined in Shopware and define new width properties inside them.
@media screen and (min-width: @phoneLandscapeViewportWidth) {
    .box--custom {
        width: 100%;
    }
}

@media screen and (min-width: @tabletViewportWidth) {
    .box--custom {
        width: 50%;
    }
}

@media screen and (min-width: @tabletLandscapeViewportWidth) {
    .box--custom {
        width: 33.33333%;
    }
}
Styling the product box
In the last step we will add styling to the product box itself, add the hover effects and finalize the look of our listing. Notice that we are using the .unitize() mixin to calculate the pixel values into rem values. Also, our product images in this example have a transparent / single color background, which allows us to simply set the background of our product box to the same color. We are also using the top / translate solution to center the product image horizontally:
.box--custom {

    .box--content {
        .unitize(height, 300);
        background-color: #F6F6F6;
    }

    .box-custom--info {
        background-color: rgba(218, 218, 218, 0.74);
        display: none;
        height: 100%;
        left: 0;
        position: absolute;
        top: 0;
        width: 100%;
        z-index: 2;
    }

    &:hover .box-custom--info {
        display: block;
    }

    .info--wrapper {
        .unitize(padding, 35);
        bottom: 0;
        display: block;
        height: 45%;
        position: absolute;
        width: 100%;

        .info--name {
            .unitize(font-size, 30);
            color: #000;
            display: block;
            font-weight: 300;
            text-align: center;
        }

        .info--price {
            .unitize(font-size, 22);
            display: block;
            text-align: center;
        }
    }

    .image--element {
        position: absolute;
        top: 50%;
        transform: translate(0, -50%);

        .image--media img {
            .unitize(padding, 30);
            height: 100%;
        }
    }
}
Download theme plugin
If you want to take a closer look at all the code we have written in this tutorial you can download this plugin:
The theme is packed inside a plugin. This is a requirement to distribute themes via our store. The structure of the theme is exactly the same as before, it is just placed a few layers deeper in the directory hierarchy:
SwagCustomListingTheme
└── Resources
    └── Themes
        └── Frontend
            └── *The theme folder*
In addition, the root directory of the plugin contains a plugin base file and a plugin.xml with meta information.
For more information on the Shopware plugin system, please head over to our developer documentation.